
Updated: 2026-06-17|Real-time information should be verified against official announcements
When it comes to chasing the aurora, I always feel you have to calibrate your expectations first. Yellowknife is almost universally recognized as one of the places in North America with the highest hit rate for seeing the Northern Lights, but the “highest hit rate” does not equal “guaranteed to see them” — it means that as long as you stay long enough, your chances of seeing them are very good. So what really determines whether an aurora trip succeeds is often not the month, but how many nights you stay, whether you can dodge the clouds, whether you can handle the cold well enough, and — if you go alone — whether you can hold up mentally through those freezing pre-dawn hours. This article follows exactly that logic and lays out the key planning points one section at a time.
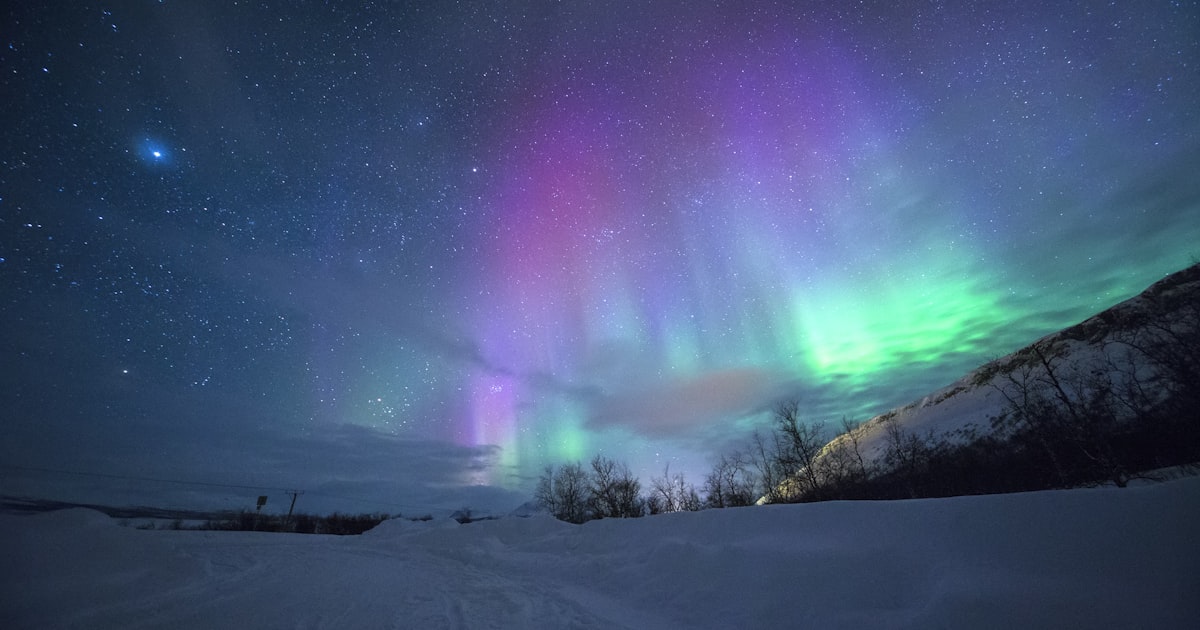
First, why here. Yellowknife sits at roughly 62.45 degrees north latitude, placing it right beneath the “Auroral Oval” — the ring zone where auroral activity is most concentrated. According to Spectacular NWT, the Northwest Territories’ official tourism body, the entire Northwest Territories can have as many as 240 nights of auroral activity in a year. Add to that its inland, dry climate, abundant clear skies, and low light pollution, and it is the stacking of these conditions that has made it so famous within the aurora-chasing community. One caveat: “240 active nights” is a regional statistic referring to the number of nights with auroral activity — it does not mean the days you happen to visit will certainly have clear, cloudless skies. To actually see the aurora, three things must be satisfied at once: solar activity strong enough, skies dark enough, and skies clear enough. You can’t control the first two, but you can raise your hit rate by “staying a bit longer,” and pick which nights to head out by watching the cloud-cover forecast.
When to go: two seasons, each with trade-offs
Officially, Yellowknife’s aurora season is split into two stretches, and the summer in between is essentially blank because the daylight is too long (close to the midnight sun):
| Season | Approximate period | Characteristics and trade-offs |
|---|---|---|
| Autumn aurora | Roughly mid-August to late September | Relatively mild weather, no need for full armor; the lakes have not yet frozen, so there’s a chance to photograph aurora reflections. The downsides are shorter nights, mosquitoes, and autumn rain. |
| Winter aurora | Roughly mid-November to early April of the following year | Long nights, dry air, plenty of clear skies, the best clarity in photos, plus you can pair it with snow activities like dog sledding and ice fishing. The downside is summed up in one word — “cold” — winter routinely drops below minus 30 degrees Celsius. |
How to choose? If you’re afraid of the cold, it’s your first aurora chase, or you want to take it easy, autumn is friendlier; if you want that textbook snowy-landscape aurora shot and to enjoy snow activities while you’re at it, go for deep winter. Outside these two stretches (for example May to July), don’t make a special trip just for the aurora. For actual solar activity and day-to-day conditions, please defer to the official weather and aurora forecasts.
Next is the point I most want to stress: don’t stay just one night. The aurora is a matter of luck, and betting on a single night’s sky makes it very easy to come up empty. Most aurora operators and resources recommend booking at least 3 nights or more — stretching out your stay gives you a few more chances at that “the sky just happens to be clear and the aurora just happens to come out” moment. This is exactly why common package tours are typically designed as 4 days/3 nights or 5 days/4 nights. Be sure to keep your itinerary flexible: you can schedule snow activities or a supply run into town during the day, but try not to pack the “prime viewing window” of 10 p.m. to 2 a.m. solid — if you see it, stay as long as you like, and if you don’t, no need to fret, just come back the next day.
Lodging broadly comes down to two approaches, each suited to different people. Staying downtown (Downtown Yellowknife) has the advantage that meals, supermarkets, pharmacies, and gear rentals are all convenient, and at night you join an aurora tour that shuttles you out to a dark spot in the countryside — this is the most worry-free option for travelers on a tight budget, first-timers, or solo travelers, since you don’t have to find a viewing spot yourself in the dark, and it’s safer too. Staying at a lakeside or out-of-town lodge offers complete scenery and immersion — you look up and there’s the sky, with no need to move in the middle of the night — but it usually costs more, transport is limited, and resupply is inconvenient, making it better suited to those with ample budget who want to focus on photography. There are also sightseeing-style camps like Aurora Village along the Ingraham Trail, with heated seating, warm-up cabins, and teepees, so you can step inside to warm up while waiting for the aurora — a very practical plus for those who feel the cold. For specific prices, opening times, and shuttle arrangements, it’s best to confirm directly with each operator or lodging, and treat official announcements as authoritative.
Can you chase it alone? You can, and it’s actually not hard. The key is to outsource the “moving around” part: stay downtown and sign up for an aurora tour with shuttle service, and you won’t have to drive or walk alone in the countryside at minus several dozen degrees in the dead of night; the group vehicle has heating and a guide who reads the sky, which is far more reassuring than waiting alone. Daytime activities like dog sledding, ice fishing, and snowshoe hiking are also commonly booked as a single person, so there’s nothing awkward about it. The one thing you have to be honest with yourself about is your cold tolerance — when you’re waiting outdoors alone, there’s no companion to help keep an eye on your condition, so be sure to fully bundle up, bring your phone and a power bank, and let your lodging or operator know your itinerary.
Keeping warm and taking photos: the cold really does bite
Winter in Yellowknife often drops below minus 30 degrees Celsius — and that’s not just an adjective. Dress in onion-style layers: the base layer is moisture-wicking thermal tops and bottoms (don’t wear pure cotton — once wet, it’ll make you colder); the mid layer is a fleece or down insulating layer; the outer layer is a windproof, waterproof heavy coat and snow pants; and accessories include a warm hat, neck gaiter, windproof gloves (ideally bring a thin pair too for operating the camera), thick socks, anti-slip snow boots, plus hand warmers. Many aurora tours provide thickened one-piece snowsuits, blankets, and warm drinks, so you can ask in advance whether they’re included when you book. As for photography, the cold drains batteries extremely fast — bring a few spare batteries kept warm against your body, and a tripod is a must (handheld long exposures will definitely be blurry). If you’re shooting on a phone, practice the night/long-exposure mode at home before you leave — don’t fumble with the settings for the first time on-site with frozen hands.
How to get there? The most common way in and out of Yellowknife is by plane, and connecting through Alberta is the most convenient: Edmonton to Yellowknife is about 2 hours 27 minutes, and Calgary about 2 hours 33 minutes. Airfares fluctuate a lot in peak season, so it’s best to book early and compare different departure dates. Don’t budget by looking at the single ticket price alone — break it down for a more accurate estimate: airfare, lodging, aurora tours, daytime activities, dining, insurance, and a contingency fund, each counted separately. In peak season (especially Christmas through Lunar New Year, as well as the autumn and winter aurora peaks), both lodging and flights get noticeably more expensive; my recommended order is to lock in lodging for those nights first, then circle back to compare aurora tours and transport options, and book the flight last — because peak-season lodging is the hardest to grab. To connect the whole trip to other cities, you can plan the legs before and after against the Canada travel map, and once you land, you can also refer to the Canada life guide for the details of daily life there.
And what if you really don’t see the aurora — was the trip wasted? The aurora is inherently uncertain, which is exactly why you should plan 3 nights or more and keep your itinerary flexible. Even if the weather doesn’t cooperate on a few nights, the daytime dog sledding, ice fishing, snowshoe hiking, and the sky full of stars on clear nights are worth the price of admission in themselves. Treat it as a northern winter experience — seeing the aurora is a bonus, and not seeing it still makes a story — and your mindset will be much more relaxed; if you’d like to add a few more northern spots, you can also flip through the complete roundup of Canada attractions. And the usual reminder to close: this article lays out planning directions and operational key points, but for anything involving the actual dates of the aurora season, each operator’s prices and opening times, flights, and lodging, please be sure to check the latest announcements from official sources and operators before you depart, and treat official information as authoritative.
This page may contain affiliate links. If you book activities through these links, Let’s Canada may earn a small commission at no extra cost to you.
Leave a Reply